
In this article, I will show you how to Install macOS Tahoe 26 on your Windows PC (Laptop or Desktop) using Opencore. Build your macOS Hackintosh with Opencore on any Windows PC.
REQUIREMENTS
- 32gb Flash Drive (or more)
- macOS Tahoe Installer File – DOWNLOAD
- balenaEtcher – DOWNLOAD
- Prebuilt Opencore EFI – DOWNLOAD
- MiniTool Partition Wizard – DOWNLOAD
- Explorer++ – DOWNLOAD
- Gen SMBIOS – DOWNLOAD
- ProperTree – DOWNLOAD
- Opencore Configurator – DOWNLOAD
There are three ways you can get Opencore EFI which is the most important component of our Hackintosh Installation. You can either Create it manually yourself using this guide, use a Prebuilt EFI or Request a Custom EFI from us based on your hardware: Request Custom EFI.
For Prebuilt Opencore EFI File, it may be different based on your CPU so check your CPU model on your PC and confirm the codename in other to download the correct EFI file. Check CPU Codename – Labs
Hold Ctrl + Shift + Esc to open Task Manger. Then Click on Performance, Click on CPU and Copy your CPU name. E.g: Intel(R) Core(TM) i7-4790 CPU @ 3.20GHz.
(4)790 CPU means it’s a 4th generation CPU and the codename is Haswell
You can simply check the codename by searching for your CPU on our Labs Website


Install MacOS Tahoe on Windows PC
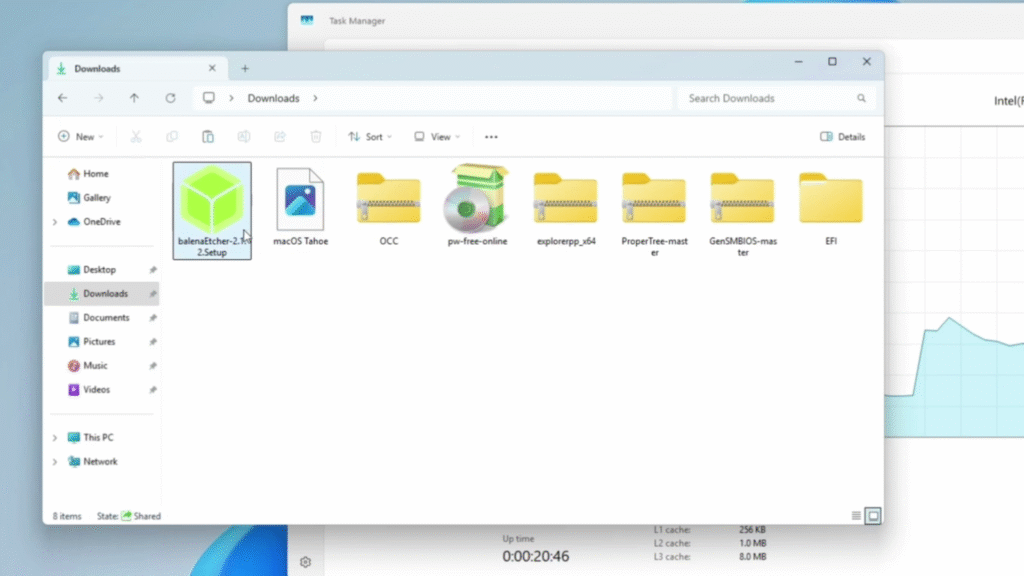
STEP 1: Download each and every one of the files from the requirements section. That’s what we will be using throughout the installation.
STEP 2: Install balenaEtcher
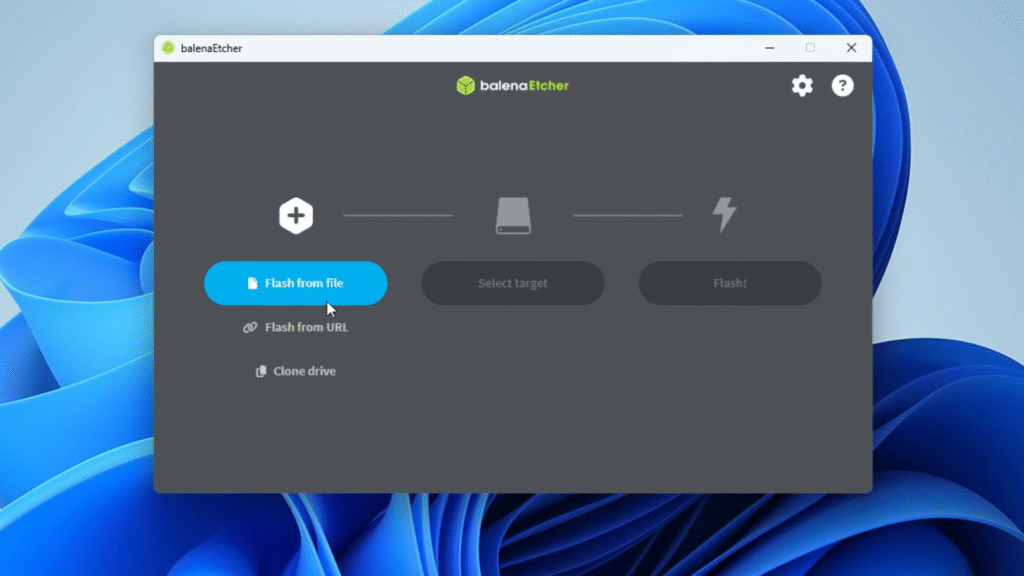
STEP 3: Now we have to create macOS Tahoe bootable drive with our Flash Drive so connect your USB Flash Drive to your PC.
Then Click on the + icon to Flash from File and Select your Downloaded Tahoe Installer file.
Now select your USB Flash Drive as well and Then Click Flash.
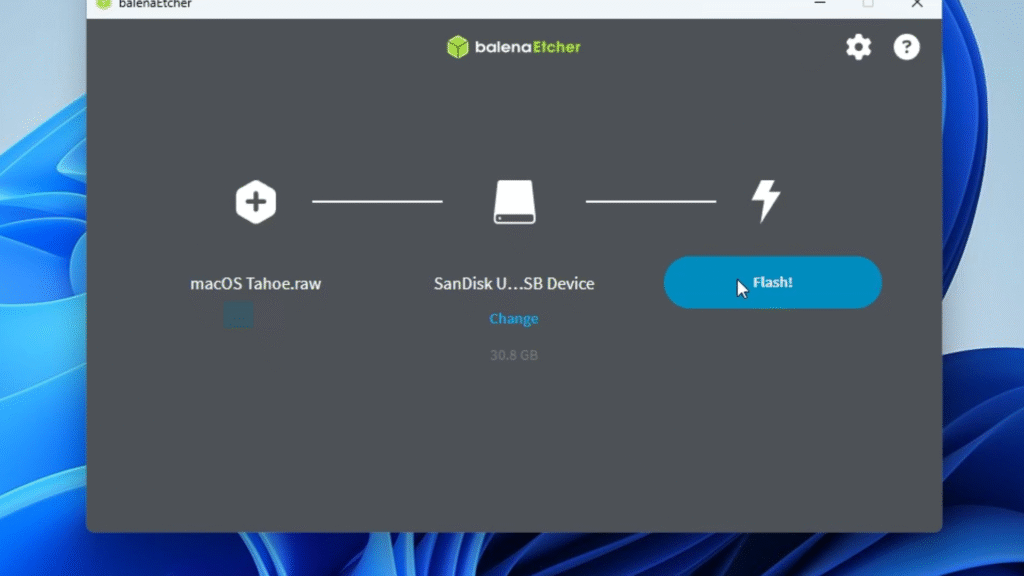
It should take some about 25 minutes to successfully create our bootable drive.
STEP 4: After successfully creating our bootable drive, we have to rename a partition on our drive. Install MiniTool Partition Wizard to get started with that.
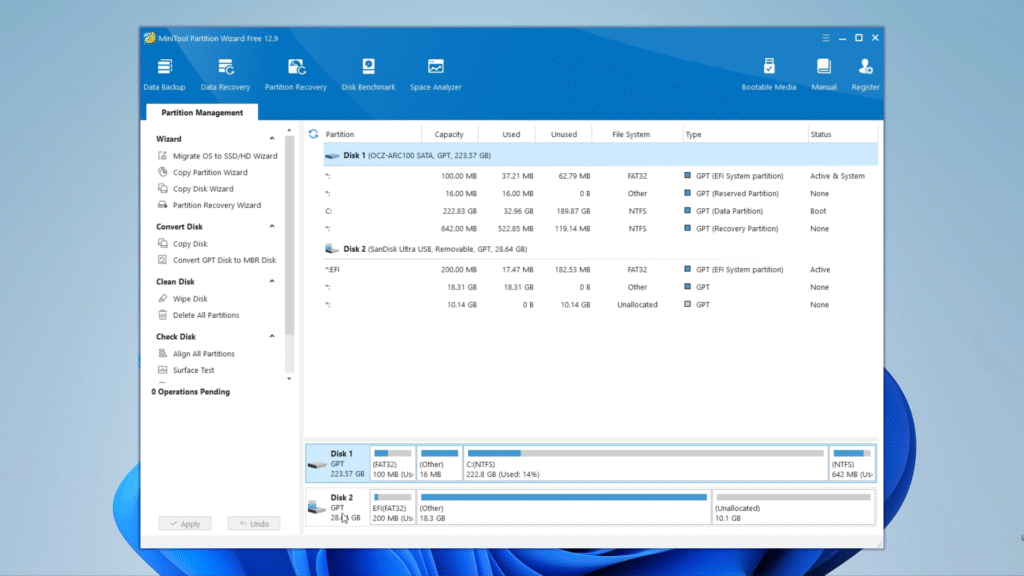
STEP 5: Now you should see your USB Drive Down there with three (3) partitions: EFI(FAT32), Other and Unallocated. Right Click on EFI(FAT32) partition and then Click on Change letter, change it to whatever letter you want and then click on Apply Changes to save (you might need to click it twice).

STEP 6: After changing the drive letter of the EFI partition we now have to copy our downloaded EFI files to the EFI partition of our drive. But we won’t use our normal file explorer to do that.
Extract Explorer++ with WinRAR or any other file extractor, then open the extracted folder and you’ll find Explorer++. Right click and click on Run as Administrator.

STEP 7: Now locate your Flash Drive EFI partition (It should bear the letter we assigned to it earlier).
Open the EFI partition and delete every file and folder inside.

STEP 8: Now locate Opencore EFI (either the custom one from us or the prebuilt one) and extract the zip file.
Open the extracted folder of Opencore EFI in Explorer++ and copy the folder named EFI to our partition EFI on our flash drive.

STEP 9: We are about to begin the installation but before that we need to confirm where we are installing macOS Tahoe 26. If you have just one Hard Drive on your PC then you should backup your files because while installing you’ll need to format the hard drive.
Alternatively you can also create a new partition to install macOS on your current drive so you can run both windows and macOS on the same PC (Which is what I would be doing).
STEP (PARTITION YOUR DRIVE): To partition your drive, Open your search bar and search for disk partition. Click on Create and format hard disk partitions and it should open Disk Management Tool.
Now Right Click on the drive you wish to partition and Install macOS and click on Shrink Volume.
Now set the size of partition it should create (Recomended 50gb+)
And then click on Shrink to Create the new Partition.

You can now right click on the new partition with label Unallocated and click on New Simple Volume. Give the partition a name (macOS) and assign letter so you can easily identify it and click Finish.

STEP 10: Now we are ready to start installing macOS Tahoe
Restart your PC and open your BIOS Setup page by holding F2, F12 or F9 depending on your PC.
- Acer: F2 or DEL
- ASUS: F2 for all PCs, F2 or DEL for motherboards
- Dell: F2 or F12
- HP: ESC or F10
- Lenovo: F2 or Fn + F2
- Lenovo (Desktops): F1
- Lenovo (ThinkPads): Enter + F1.
- MSI: DEL for motherboards and PCs
- Microsoft Surface Tablets: Press and hold volume up button.
- Origin PC: F2
- Samsung: F2
- Sony: F1, F2, or F3
- Toshiba: F2
Source: hp.com
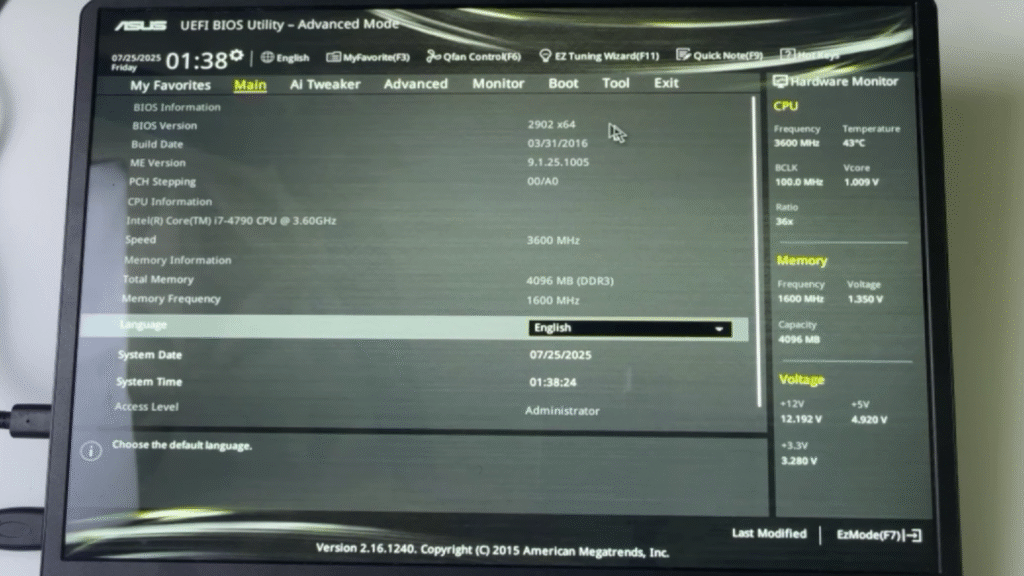
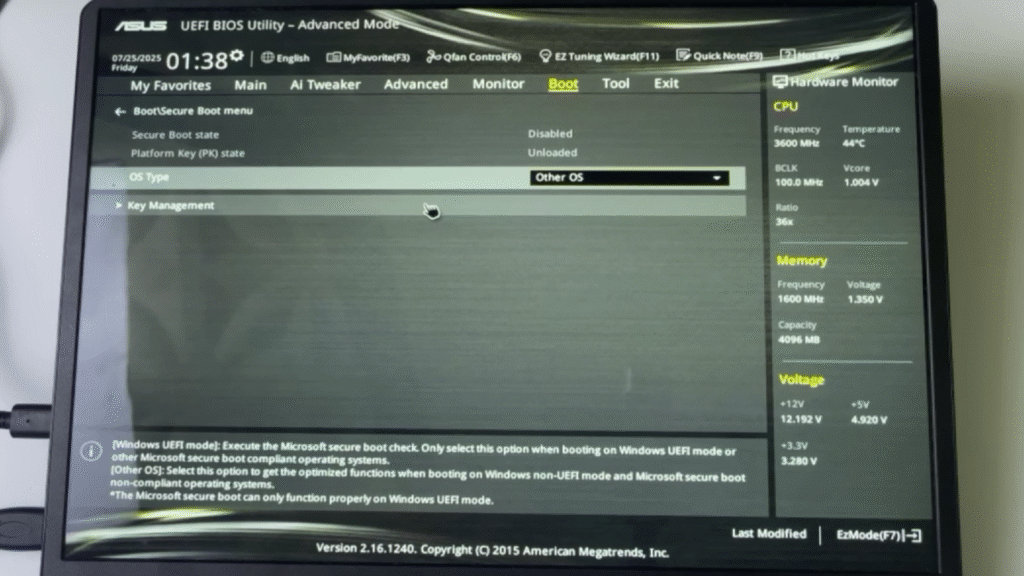
STEP 11: BIOS/UEFI Configuration
Enable
- Enable VT-x
- Above 4G decoding
- Hyper-Threading
- Sata Mode to AHCI
Disable:
- Fast Boot
- Secure Boot
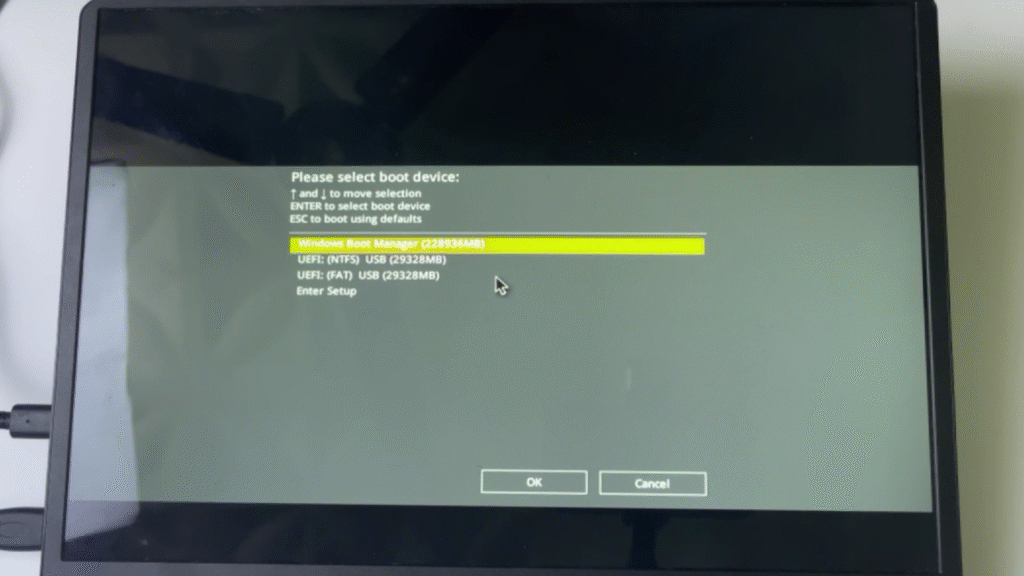
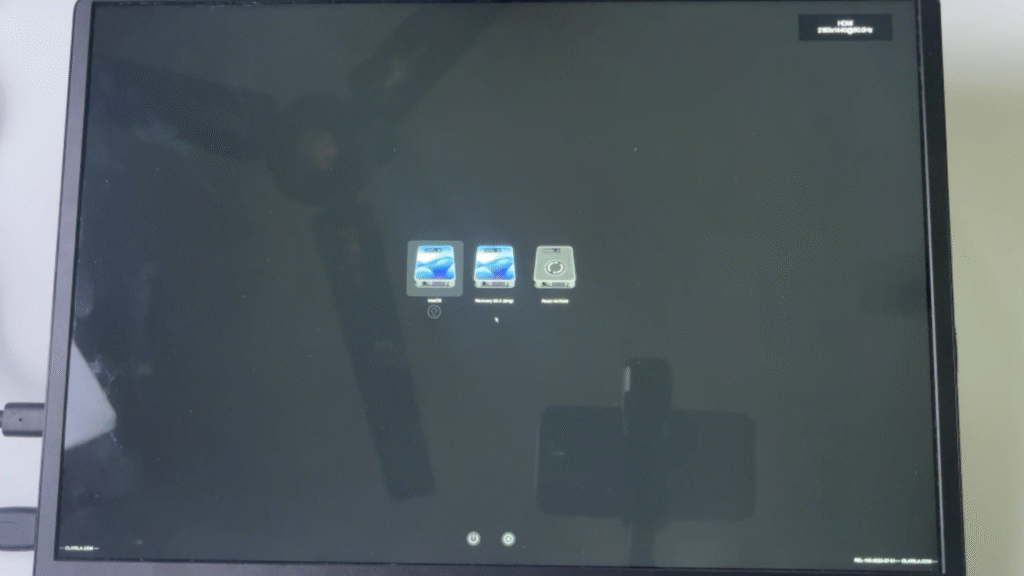
STEP 12: Now boot into the Boot Options and select your Flash Drive which will be shown there to boot into macOS Installation.
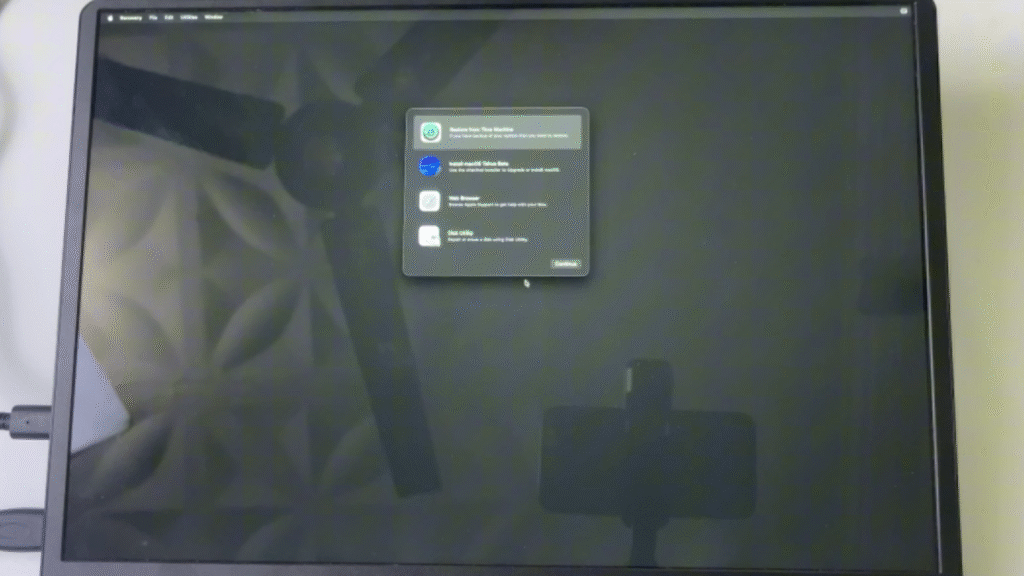
STEP 13: It should load up Opencore. First Select Reset NVRAM and it should restart.
Next proceed to insall macOS Tahoe.
Set your installation Language and Next
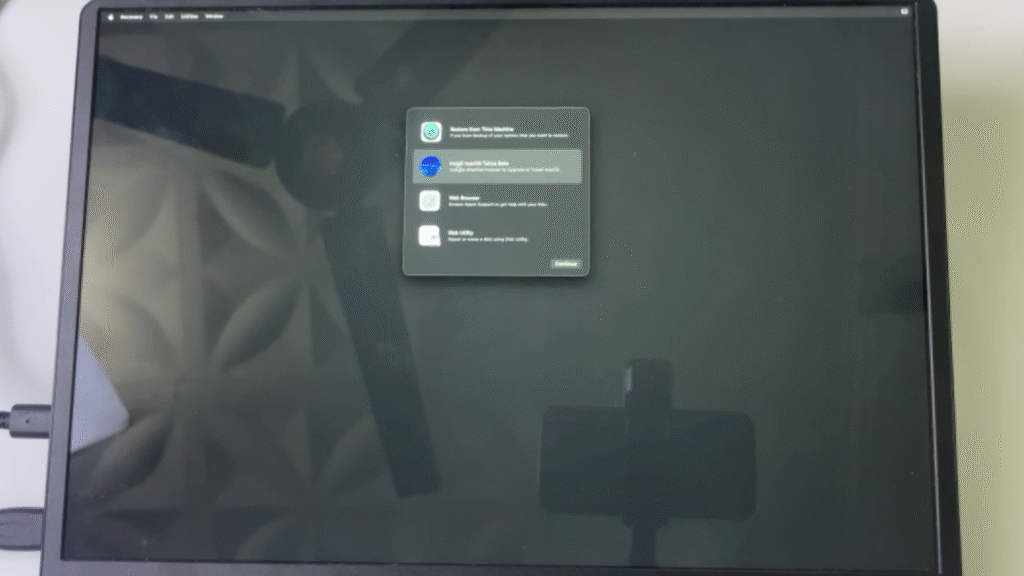
And then Click on Disk Utility and Continue
STEP 14: Now it should show up all your Drives
Select the Drive you partition earlier where you want to install macOS and then click on Erase
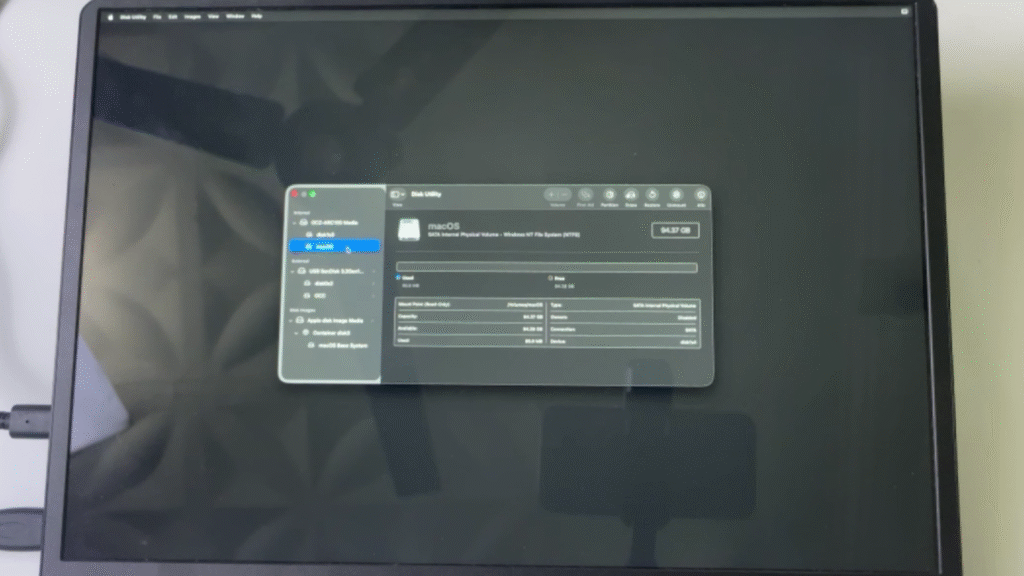
STEP 15: Give it a name and set the Format to Apfs
Then click on Erase.
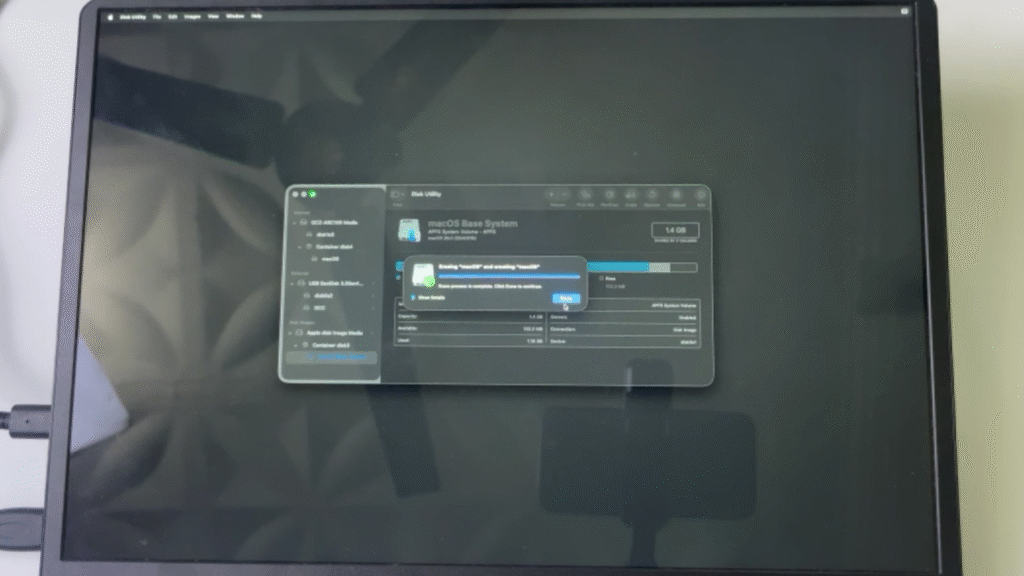
STEP 16: After Erasing the partition or drive, Close the Window and Click on Install macOS Tahoe and then Continue.
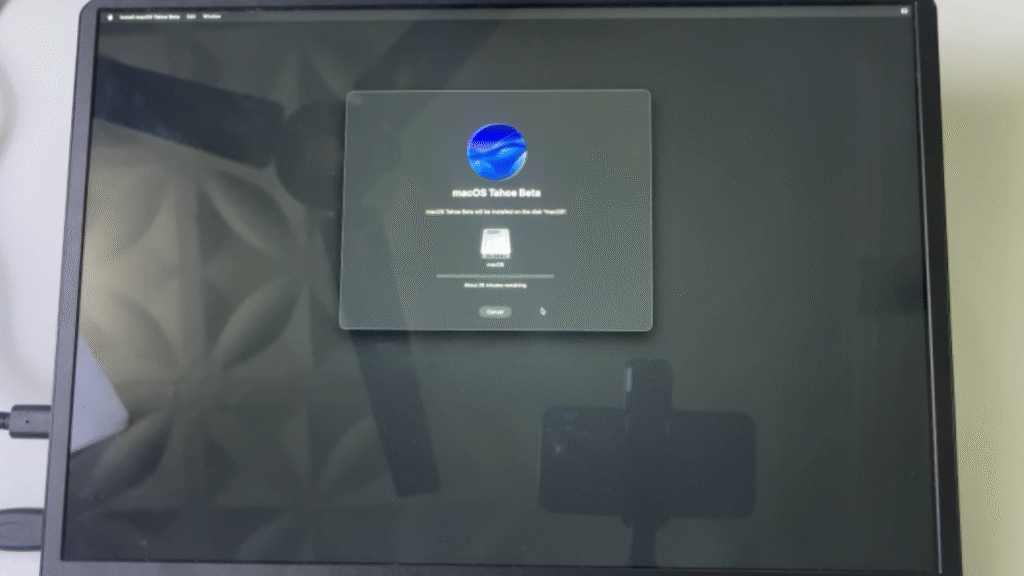
STEP 17: Agree to the terms then Select the drive we just erased and then Continue and it should start Installing.
Note: It may take an hour or less to install and It’ll restart severally while installing. You just have to wait patiently and allow it install.
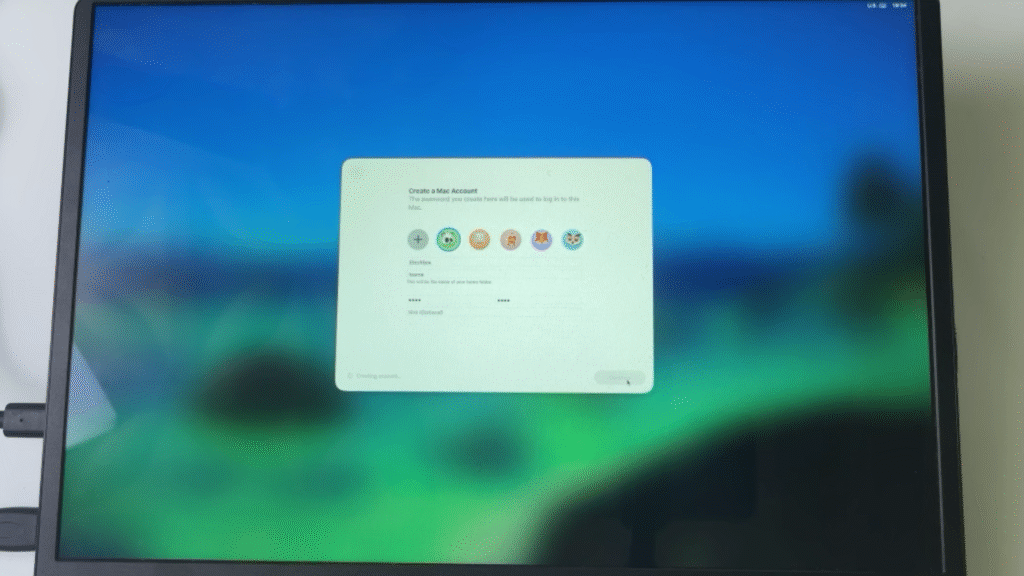
STEP 18: After about an hour of rebooting over and over again it should be successfully installed and we can now setup based on our preference.
Set your Country, Region, Privacy settings and also sign in or signup with your Apple ID. It works perfectly.
STEP 19: Also set a Username and Password for your machine and then choose between Light Mode and Dark mode Theme.
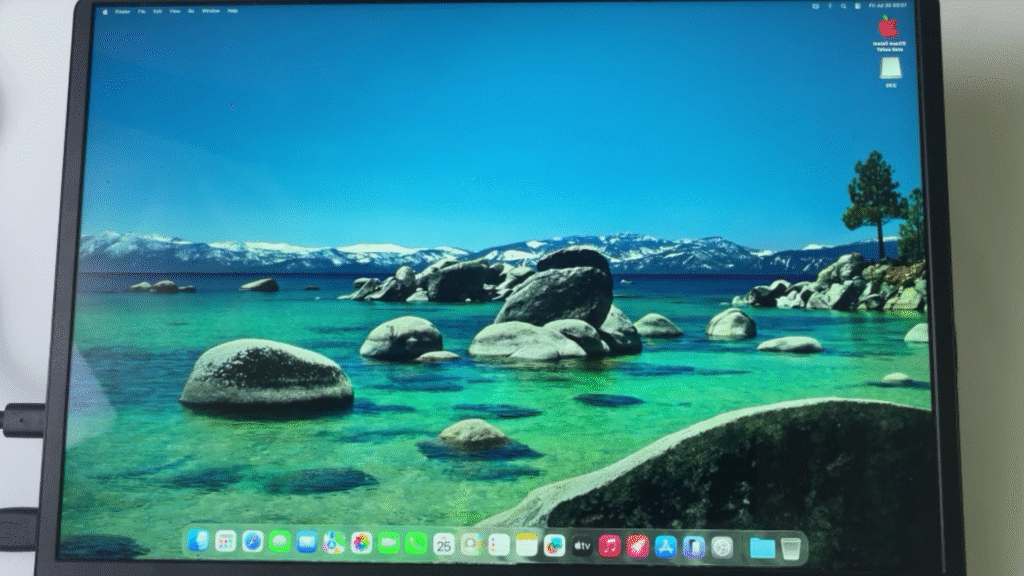
STEP 20: Setup Completed. One more thing to do before we can begin using our Hackintosh. Remember we used a USB Drive to setup. Now we have to copy our EFI files from our flash drive to our Hackintosh EFI Partition.
STEP 21: We need Opencore Configurator.
Open Opencore Configurator after downloading and you’ll see an icon at the top right corner of your screen. Click on it.
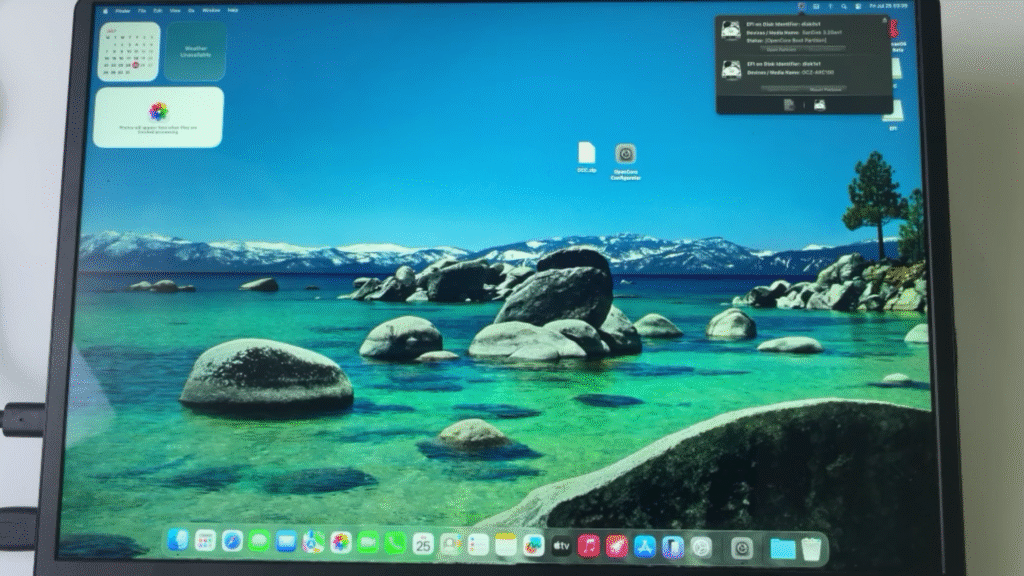
STEP 22: Mount and Open both the EFI Partition on our Flash Drive and on our main drive.
The EFI Partitition on our Main Drive currently contains Windows Boot Files and the EFI Partition on our Flash Drive contains Opencore Files needed for macOS.
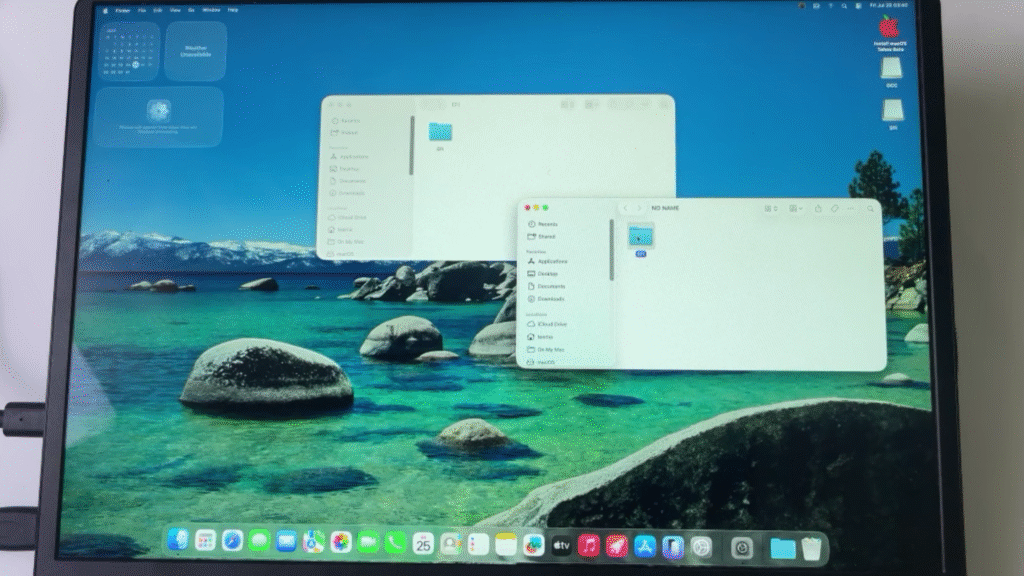
STEP 23: Copy the Files inside our Flash Drive EFI (Boot and OC) and Paste it inside our Main Drive EFI Folder. If you get any prompt to replace File Simply Continue.

STEP 24: Now you can eject your Flash Drive and reboot your Computer.
You can now boot ino both macOS and Windows.
And that’s all.
CONCLUSION
- Note that some CPU’s and GPU’s don’t support Tahoe but works with older versions of Mac OS with the same installation method.
- Drop a comment if you are stuck on any of the steps or you are getting an error.
You might also want to check out a full video I made on how to install:
6 Comments
The download links not working and file not longer exits
Has been updated
Which SMBIOS should I use for the i5-12500H? I have an RTX 4050 for laptop.
I couldn’t figure it out from the table 🙁
Your GPU isn’t supported
based on your video, MacPro7.1 is not suitable for me
Sorry for the 2 different messages.
What GPU are you using?